You put in hours on your diamond painting canvas. Then one wrong fold, a careless nudge, and rip. A tear shows up. Or the drills start falling off. Sticky areas vanish. The whole thing feels ruined. But it is not over. A torn or damaged diamond painting canvas can be fixed. You do not need to toss it or start again. You just need a few tools, some care, and a clear guide. This blog will show you exactly how to repair a diamond painting canvas from sealing tears to restoring stickiness and flattening bubbles. No fluff. Just real solutions.
"Every diamond placed deserves to shine. Even after a setback."
Identify the Damage | First Look at Your Diamond Painting Canvas
You cannot fix what you do not understand. And trust me, when a diamond painting canvas gets damaged, it is rarely just one type of problem. Sometimes it is a clean tear. Other times, it is a messy fold that ruins the glue. Maybe it sat under something heavy, and now there are weird bubbles all over it. Or drills just... fall off. Annoying, right? Before you jump into repairs, take a few minutes to do a proper canvas damage assessment. It saves time later and tells you what tools and steps you will need. Here is a quick breakdown of what to check:
1 | Tear, Cut, or Puncture
This one’s the heartbreaker. You see a rip, and your stomach drops.
- Look for sharp splits, ripped fabric edges, or jagged holes
- Run fingers behind the canvas to feel for weakening
2 | Adhesive Peel or Non-Sticky Spots
Your drills fall off, even though you swear you pressed them down properly.
- Areas where drills no longer stick or slide off
- Might look glossy, dusty, or exposed
3 | Wrinkles, Bubbles, or Rivers
That annoying warping that just won’t stay flat, yeah, that’s this.
- Air pockets trapped beneath the top layer
- Wavy texture that lifts drills
4 | Detached or Missing Drills
You did place those drills... right? Then where did they go?
- Empty gaps despite placing drills
- Sometimes caused by poor adhesion or folding pressure
"The more accurate your diagnosis, the smoother your fix."
Now that you know what you are dealing with, let’s fix it the right way.
What You’ll Need | Tools to Repair Your Diamond Painting Canvas
You cannot fix a diamond painting canvas with just hope and bare hands. If you want a clean, nearly invisible repair, you need the right stuff. Not fancy tools, but the kind of repair tools that give you control, precision, and a smooth finish. Think of it like a small first-aid kit, but for your art. Here’s your go-to list:
-
Transparent patch canvas: Helps reinforce tears from the back without blocking light
-
Double-sided tape, glue dots, or adhesive pen: For reapplying stickiness to loose or dull sections
-
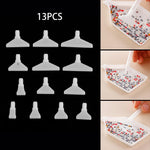
Micro-brayer: Used to flatten bubbles and press patches or drills firmly into place
-
Lint-free cloth: Wipes dust or debris without leaving fibers behind
-
Tweezers & heavy books: Tweezers to reposition drills, books to flatten warped areas overnight
Tip: Keep this kit in a small box near your workspace; you’ll use it more often than you think.
Your diamond painting canvas deserves more than a quick fix. Give it tools that work. Before you fix a tear, it helps to remove wrinkles and folds properly, this simple guide to flattening diamond painting canvases shows you how to do it without damaging the adhesive.
Get Set First | Prep Your Workspace and Canvas
Before you start touching up your diamond painting canvas, slow down. One of the biggest reasons fixes fail? Rushing without proper setup. A clean space means fewer errors and fewer hairs, dust specks, or misplaced drills. So breathe, clear some room, and prep like a pro.
-
Clear a flat, stable surface
Use a hard tabletop or cutting board, not your lap, not your couch arm.
-
Leave the protective film on unused areas
Only peel back the part you’re working on. Keeps other sections dust-free and sticky.
-
Use a lightbox if you have one
It helps with drill placement and edge alignment, especially if patching or re-sticking.
This step is quick, but trust me, it sets the tone for the whole repair.
Your diamond painting canvas will thank you for your patience.
Repairing a Tear | How to Patch a Damaged Diamond Painting Canvas?
A rip in your diamond painting canvas feels personal. You spot it. You freeze. You wonder if it’s salvageable. The good news? It usually is. But you have to handle it gently, like a cracked phone screen; you do not want to press too hard. If done right, a patched area can disappear into the background. If rushed, though? It puckers, shifts, and ruins hours of your effort. So let’s slow it down and fix it the right way.
-
Trim a patch canvas at least 1 cm larger than the tear
Use transparent canvas material (not thick cloth or paper). This lets light pass through and keeps it flexible.
-
Tape or adhere the patch behind the tear
Apply strong double-sided tape or a thin layer of brush-on glue around the edges, not on the tear itself.
-
Align the torn edges gently from the front
Do not stretch the canvas. Just match the lines naturally. A lightbox helps here.
-
Press the patch using a brayer
Roll gently, then place heavy books on top for at least 24 hours to bond it properly.
-
Reinforce the gap with glue dots or adhesive
Once dry, dab glue dots over any exposed fabric. This restores stickiness for the drills.
-
Use tweezers + lightbox to replace lost drills
Place them one by one. Take your time, it is worth it.
“Canvas tears look bad… until they vanish. This patch trick makes them vanish.”
Your diamond painting canvas can look flawless again. All it takes is care and this patch technique.
Restore the Stick | Fixing Adhesive on Your Diamond Painting Canvas
So you touch the canvas... and it feels dry. No grip. Drills keep falling off. Frustrating, especially when you know you placed everything perfectly. But here is the thing: adhesive wears out. Over time, dust settles, oils transfer, or maybe it just ages. Luckily, there are solid ways to restore adhesive on your diamond painting canvas without ruining the artwork. Here is what to do:
-
Clean the area gently with a lint-free cloth: Do not rub too hard, just enough to lift off any dust or residue.
-
Apply double-sided adhesive tape or an adhesive pen: These work great for small patches. If the area is larger, use a double-sided adhesive sheet cut to size.
-
Press the drills back into place and roll them:
Use a micro-brayer for even pressure. Do not press with fingers, as it lifts the adhesive.
-
Let it cure for a few hours: The adhesive needs time to bond. Walk away. Let it do its thing.
“When the canvas loses its grip, give it a second chance to hold on.”
Your diamond painting canvas is not finished. It just needs a little re-stick magic to shine again.
Flatten the Frustration | How to Smooth Your Diamond Painting Canvas?
You unroll your diamond painting canvas, and there they are, bubbles, rivers, and folds running through your design like scars on a perfect face. Your heart drops a little. How are you supposed to place drills on this? The good news? You can fix it. And no, you do not need to toss the whole canvas or panic. Let’s calm those wrinkles one method at a time.
-
Use parchment paper and a low-heat iron
Place a sheet of parchment over the area and press gently with a low-heat iron. Do not steam. Just a few seconds. This softens and resets the glue beneath the top layer.
-
Lay heavy boards or books over the area
Once ironed, press it flat under a board for 6–8 hours. This helps it stay smooth as the glue resets.
-
Press out trapped air bubbles with a micro-brayer
Start at the center of the bubble and roll outward. Be gentle, do not stretch the canvas.
“The canvas will only lie flat if you treat it with care, not force.”
Fixing this takes patience, not pressure. Your diamond painting canvas is flexible it just needs time to settle right.
Drills Out of Line? | Realign Them Without Ruining the Canvas
You step back to admire your diamond painting canvas, and... something feels off. A few drills are crooked. Maybe a row shifted. It is not ruined, but your eye goes right to that one misaligned section every single time. The fix? Simple. Quick. And oddly satisfying.
-
Use tweezers under a lightbox for precision: Gently lift the misplaced drill using sharp tweezers. A lightbox makes it easier to follow the original grid and spacing. No guessing.
-
Realign and press it back into place: Adjust the drill with care. Match it to the surrounding lines. Do not shove it should settle naturally.
-
Roll the area down again with a brayer: This helps the drill bond back to the adhesive, especially after adjusting.
“Tiny corrections make a big difference when it comes to perfection.”
Even the best diamond painting canvas needs a little tweak now and then. And that’s perfectly normal.
Wipe It Down | Clean Your Diamond Painting Canvas Before Sealing
You are almost there. The tear is patched, the drills are realigned, and your diamond painting canvas looks brand new. But before sealing or framing it, clean it properly. Even tiny bits of lint or dust can ruin that final finish. Think of this step as giving your art one last polish before its spotlight.
-
Remove debris using a lint roller or soft microfiber cloth
Roll gently across the canvas to lift dust, pet hair, or rogue drills. Do not press too hard.
-
Blot any adhesive spills or smudges
Use a dry cloth. Avoid using liquid cleaners they can damage the glue underneath.
-
Let the canvas fully air-dry if touched or adjusted
Give it 20 - 30 minutes to rest before applying sealant or placing it in a frame.
“Clean surface, clean finish. Do not rush the last step.”
Your diamond painting canvas deserves a crisp, clean presentation. A few extra minutes here make all the difference.
Seal It & Show It Off | Frame Your Repaired Diamond Painting Canvas
You fixed the tear. Replaced the drills. Cleaned every edge. Now comes the satisfying part, sealing your diamond painting canvas so it stays flawless for years. Sealing protects your hard work from dust, humidity, and loose drills. It locks everything in, without dulling the sparkle, as long as you choose the right product and apply it correctly.
Step-by-Step Finish
-
Choose your sealant
A brush-on sealer gives you control. A spray sealant is faster but needs a steady hand. Avoid thick craft glues; they cloud the diamonds.
-
Apply a thin, even coat
Do a small test patch first. Then cover the canvas in one direction using a soft foam brush or spray from 10 -12 inches away.
-
Let it fully cure
Do not rush this. Give it at least 24 hours in a dust-free area.
-
Frame it right
Use a shadow box or deep frame so the drills do not press against the glass. No glass? That’s fine, just avoid direct sunlight.
-
Hang it somewhere dry and secure
Avoid kitchens or humid spots. And always hang on a solid hook or mount.
“You did the hard part. Now protect it like it matters because it does.”
Your diamond painting canvas is ready to be displayed, admired, and remembered.
Keep It Safe | How to Prevent Future Damage to Your Diamond Painting Canvas?
After spending hours fixing your diamond painting canvas, the last thing you want... is to fix it again. Damage often comes from storage mistakes or small habits we overlook. But with a few tweaks, you can prevent canvas damage before it even starts. Here are a few tips that work:
-
Keep the protective film on until that section is complete: It shields the adhesive from dust, hair, and oils.
-
Roll your canvas drills out, not in: Use a tube roll method to avoid creases or pressure marks on the design.
-
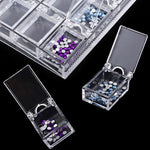
Use labeled containers for drills: No more guessing games or spilled trays. It also speeds up work time.
-
Work on a flat, stable surface: Sofas and beds are canvas killers. Stick to tables or boards.
-
Store heavy books separately: Accidental pressure ruins drill rows. Stack smart.
“Good storage habits save hours of repairs, seriously.”
Treat your diamond painting canvas like a work of art, not just a project. It deserves a little protection. After repairs, don’t forget to seal your diamond painting to protect your work and keep loose drills from falling off again.
You put in hours on your diamond painting canvas. Then one wrong fold, a careless nudge, and rip. A tear shows up. Or the drills start falling off. Sticky areas vanish. The whole thing feels ruined. But it is not over. A torn or damaged diamond painting canvas can be fixed. You do not need to toss it or start again. You just need a few tools, some care, and a clear guide. This blog will show you exactly how to repair a diamond painting canvas from sealing tears to restoring stickiness and flattening bubbles. No fluff. Just real solutions.
"Every diamond placed deserves to shine. Even after a setback."
Identify the Damage | First Look at Your Diamond Painting Canvas
You cannot fix what you do not understand. And trust me, when a diamond painting canvas gets damaged, it is rarely just one type of problem. Sometimes it is a clean tear. Other times, it is a messy fold that ruins the glue. Maybe it sat under something heavy, and now there are weird bubbles all over it. Or drills just... fall off. Annoying, right? Before you jump into repairs, take a few minutes to do a proper canvas damage assessment. It saves time later and tells you what tools and steps you will need. Here is a quick breakdown of what to check:
1 | Tear, Cut, or Puncture
This one’s the heartbreaker. You see a rip, and your stomach drops.
- Look for sharp splits, ripped fabric edges, or jagged holes
- Run fingers behind the canvas to feel for weakening
2 | Adhesive Peel or Non-Sticky Spots
Your drills fall off, even though you swear you pressed them down properly.
- Areas where drills no longer stick or slide off
- Might look glossy, dusty, or exposed
3 | Wrinkles, Bubbles, or Rivers
That annoying warping that just won’t stay flat, yeah, that’s this.
- Air pockets trapped beneath the top layer
- Wavy texture that lifts drills
4 | Detached or Missing Drills
You did place those drills... right? Then where did they go?
- Empty gaps despite placing drills
- Sometimes caused by poor adhesion or folding pressure
"The more accurate your diagnosis, the smoother your fix."
Now that you know what you are dealing with, let’s fix it the right way.
What You’ll Need | Tools to Repair Your Diamond Painting Canvas
You cannot fix a diamond painting canvas with just hope and bare hands. If you want a clean, nearly invisible repair, you need the right stuff. Not fancy tools, but the kind of repair tools that give you control, precision, and a smooth finish. Think of it like a small first-aid kit, but for your art. Here’s your go-to list:
-
Transparent patch canvas: Helps reinforce tears from the back without blocking light
-
Double-sided tape, glue dots, or adhesive pen: For reapplying stickiness to loose or dull sections
-
Micro-brayer: Used to flatten bubbles and press patches or drills firmly into place
-
Lint-free cloth: Wipes dust or debris without leaving fibers behind
-
Tweezers & heavy books: Tweezers to reposition drills, books to flatten warped areas overnight
Tip: Keep this kit in a small box near your workspace; you’ll use it more often than you think.
Your diamond painting canvas deserves more than a quick fix. Give it tools that work. Before you fix a tear, it helps to remove wrinkles and folds properly, this simple guide to flattening diamond painting canvases shows you how to do it without damaging the adhesive.
Get Set First | Prep Your Workspace and Canvas
Before you start touching up your diamond painting canvas, slow down. One of the biggest reasons fixes fail? Rushing without proper setup. A clean space means fewer errors and fewer hairs, dust specks, or misplaced drills. So breathe, clear some room, and prep like a pro.
-
Clear a flat, stable surface
Use a hard tabletop or cutting board, not your lap, not your couch arm.
-
Leave the protective film on unused areas
Only peel back the part you’re working on. Keeps other sections dust-free and sticky.
-
Use a lightbox if you have one
It helps with drill placement and edge alignment, especially if patching or re-sticking.
This step is quick, but trust me, it sets the tone for the whole repair.
Your diamond painting canvas will thank you for your patience.
Repairing a Tear | How to Patch a Damaged Diamond Painting Canvas?
A rip in your diamond painting canvas feels personal. You spot it. You freeze. You wonder if it’s salvageable. The good news? It usually is. But you have to handle it gently, like a cracked phone screen; you do not want to press too hard. If done right, a patched area can disappear into the background. If rushed, though? It puckers, shifts, and ruins hours of your effort. So let’s slow it down and fix it the right way.
-
Trim a patch canvas at least 1 cm larger than the tear
Use transparent canvas material (not thick cloth or paper). This lets light pass through and keeps it flexible.
-
Tape or adhere the patch behind the tear
Apply strong double-sided tape or a thin layer of brush-on glue around the edges, not on the tear itself.
-
Align the torn edges gently from the front
Do not stretch the canvas. Just match the lines naturally. A lightbox helps here.
-
Press the patch using a brayer
Roll gently, then place heavy books on top for at least 24 hours to bond it properly.
-
Reinforce the gap with glue dots or adhesive
Once dry, dab glue dots over any exposed fabric. This restores stickiness for the drills.
-
Use tweezers + lightbox to replace lost drills
Place them one by one. Take your time, it is worth it.
“Canvas tears look bad… until they vanish. This patch trick makes them vanish.”
Your diamond painting canvas can look flawless again. All it takes is care and this patch technique.
Restore the Stick | Fixing Adhesive on Your Diamond Painting Canvas
So you touch the canvas... and it feels dry. No grip. Drills keep falling off. Frustrating, especially when you know you placed everything perfectly. But here is the thing: adhesive wears out. Over time, dust settles, oils transfer, or maybe it just ages. Luckily, there are solid ways to restore adhesive on your diamond painting canvas without ruining the artwork. Here is what to do:
-
Clean the area gently with a lint-free cloth: Do not rub too hard, just enough to lift off any dust or residue.
-
Apply double-sided adhesive tape or an adhesive pen: These work great for small patches. If the area is larger, use a double-sided adhesive sheet cut to size.
-
Press the drills back into place and roll them:
Use a micro-brayer for even pressure. Do not press with fingers, as it lifts the adhesive.
-
Let it cure for a few hours: The adhesive needs time to bond. Walk away. Let it do its thing.
“When the canvas loses its grip, give it a second chance to hold on.”
Your diamond painting canvas is not finished. It just needs a little re-stick magic to shine again.
Flatten the Frustration | How to Smooth Your Diamond Painting Canvas?
You unroll your diamond painting canvas, and there they are, bubbles, rivers, and folds running through your design like scars on a perfect face. Your heart drops a little. How are you supposed to place drills on this? The good news? You can fix it. And no, you do not need to toss the whole canvas or panic. Let’s calm those wrinkles one method at a time.
-
Use parchment paper and a low-heat iron
Place a sheet of parchment over the area and press gently with a low-heat iron. Do not steam. Just a few seconds. This softens and resets the glue beneath the top layer.
-
Lay heavy boards or books over the area
Once ironed, press it flat under a board for 6–8 hours. This helps it stay smooth as the glue resets.
-
Press out trapped air bubbles with a micro-brayer
Start at the center of the bubble and roll outward. Be gentle, do not stretch the canvas.
“The canvas will only lie flat if you treat it with care, not force.”
Fixing this takes patience, not pressure. Your diamond painting canvas is flexible it just needs time to settle right.
Drills Out of Line? | Realign Them Without Ruining the Canvas
You step back to admire your diamond painting canvas, and... something feels off. A few drills are crooked. Maybe a row shifted. It is not ruined, but your eye goes right to that one misaligned section every single time. The fix? Simple. Quick. And oddly satisfying.
-
Use tweezers under a lightbox for precision: Gently lift the misplaced drill using sharp tweezers. A lightbox makes it easier to follow the original grid and spacing. No guessing.
-
Realign and press it back into place: Adjust the drill with care. Match it to the surrounding lines. Do not shove it should settle naturally.
-
Roll the area down again with a brayer: This helps the drill bond back to the adhesive, especially after adjusting.
“Tiny corrections make a big difference when it comes to perfection.”
Even the best diamond painting canvas needs a little tweak now and then. And that’s perfectly normal.
Wipe It Down | Clean Your Diamond Painting Canvas Before Sealing
You are almost there. The tear is patched, the drills are realigned, and your diamond painting canvas looks brand new. But before sealing or framing it, clean it properly. Even tiny bits of lint or dust can ruin that final finish. Think of this step as giving your art one last polish before its spotlight.
-
Remove debris using a lint roller or soft microfiber cloth
Roll gently across the canvas to lift dust, pet hair, or rogue drills. Do not press too hard.
-
Blot any adhesive spills or smudges
Use a dry cloth. Avoid using liquid cleaners they can damage the glue underneath.
-
Let the canvas fully air-dry if touched or adjusted
Give it 20 - 30 minutes to rest before applying sealant or placing it in a frame.
“Clean surface, clean finish. Do not rush the last step.”
Your diamond painting canvas deserves a crisp, clean presentation. A few extra minutes here make all the difference.
Seal It & Show It Off | Frame Your Repaired Diamond Painting Canvas
You fixed the tear. Replaced the drills. Cleaned every edge. Now comes the satisfying part, sealing your diamond painting canvas so it stays flawless for years. Sealing protects your hard work from dust, humidity, and loose drills. It locks everything in, without dulling the sparkle, as long as you choose the right product and apply it correctly.
Step-by-Step Finish
-
Choose your sealant
A brush-on sealer gives you control. A spray sealant is faster but needs a steady hand. Avoid thick craft glues; they cloud the diamonds.
-
Apply a thin, even coat
Do a small test patch first. Then cover the canvas in one direction using a soft foam brush or spray from 10 -12 inches away.
-
Let it fully cure
Do not rush this. Give it at least 24 hours in a dust-free area.
-
Frame it right
Use a shadow box or deep frame so the drills do not press against the glass. No glass? That’s fine, just avoid direct sunlight.
-
Hang it somewhere dry and secure
Avoid kitchens or humid spots. And always hang on a solid hook or mount.
“You did the hard part. Now protect it like it matters because it does.”
Your diamond painting canvas is ready to be displayed, admired, and remembered.
Keep It Safe | How to Prevent Future Damage to Your Diamond Painting Canvas?
After spending hours fixing your diamond painting canvas, the last thing you want... is to fix it again. Damage often comes from storage mistakes or small habits we overlook. But with a few tweaks, you can prevent canvas damage before it even starts. Here are a few tips that work:
-
Keep the protective film on until that section is complete: It shields the adhesive from dust, hair, and oils.
-
Roll your canvas drills out, not in: Use a tube roll method to avoid creases or pressure marks on the design.
-
Use labeled containers for drills: No more guessing games or spilled trays. It also speeds up work time.
-
Work on a flat, stable surface: Sofas and beds are canvas killers. Stick to tables or boards.
-
Store heavy books separately: Accidental pressure ruins drill rows. Stack smart.
“Good storage habits save hours of repairs, seriously.”
Treat your diamond painting canvas like a work of art, not just a project. It deserves a little protection. After repairs, don’t forget to seal your diamond painting to protect your work and keep loose drills from falling off again.